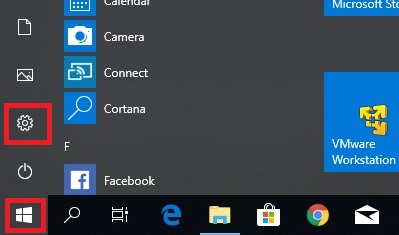
1. Click on “Windows” icon and choose “Setting”.
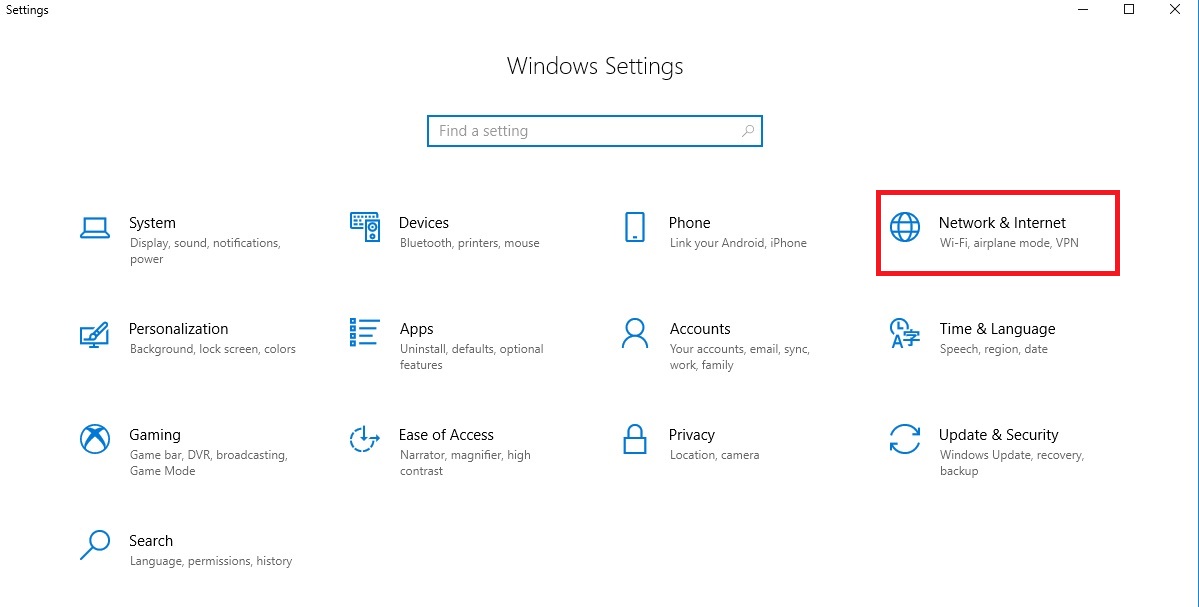
2. Click on “NETWORK & INTERNET”.
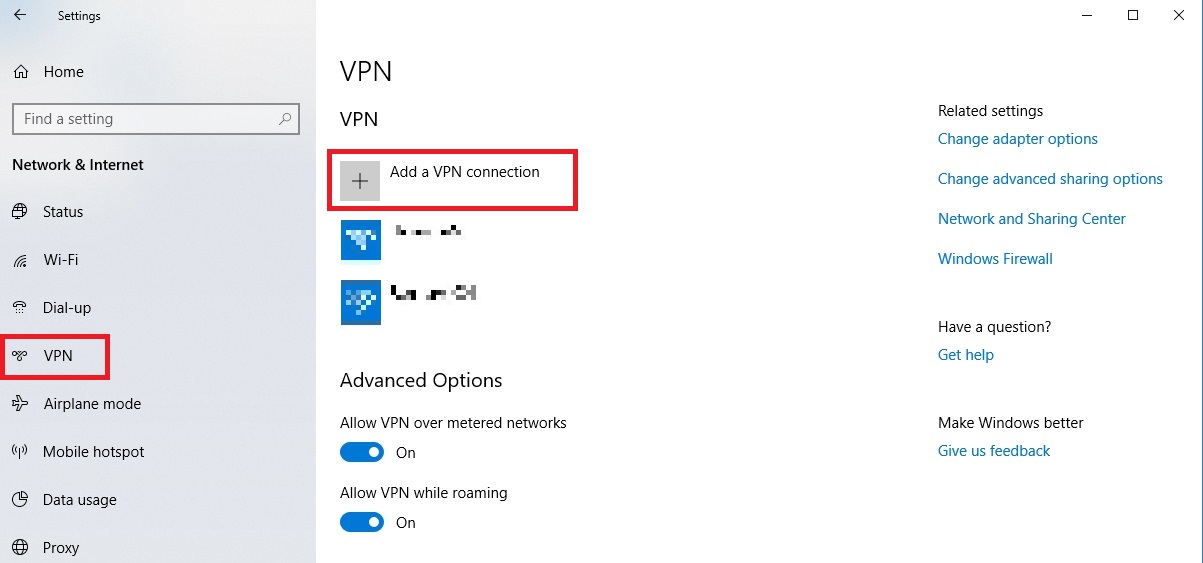
3. Click on VPN then click on Add a VPN connection.
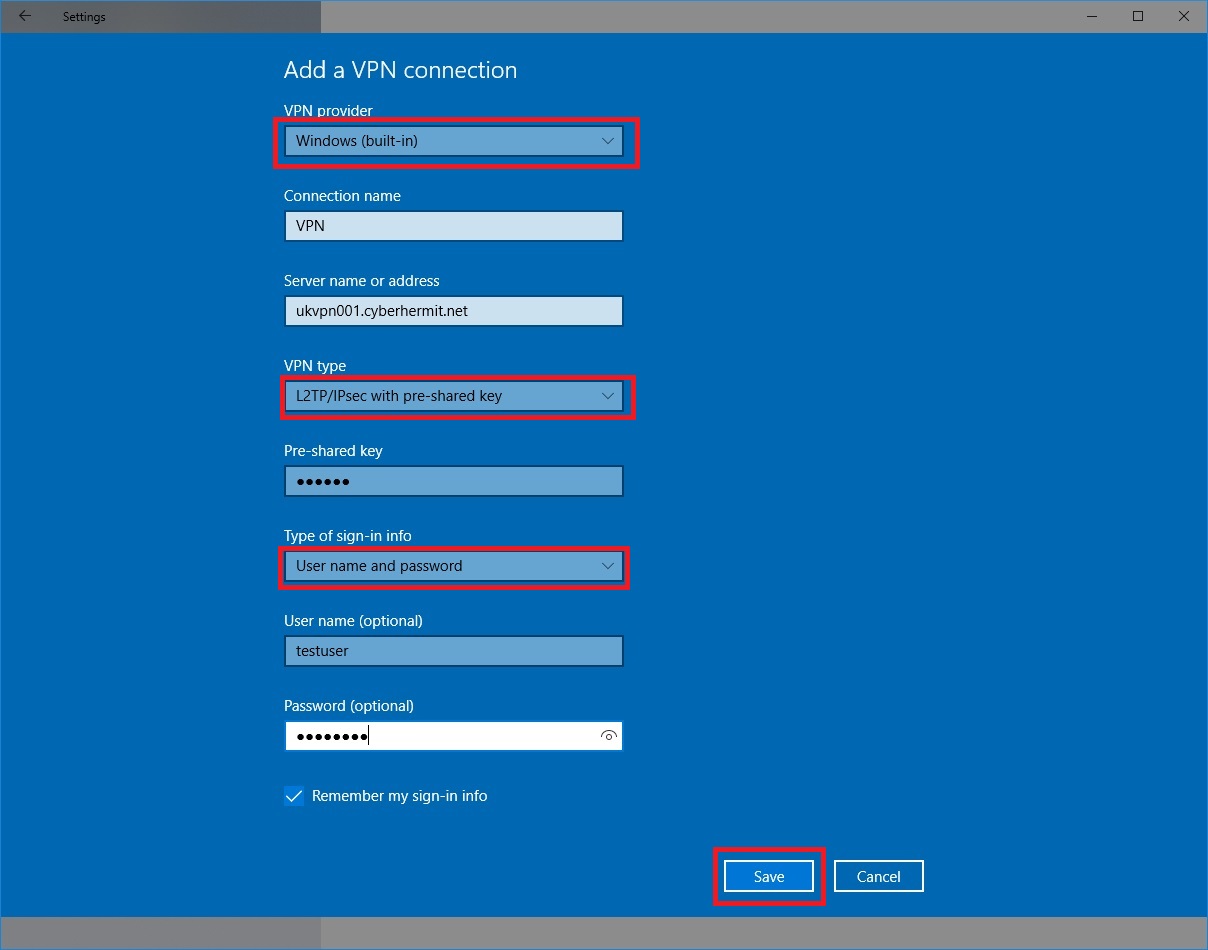
4. Insert the following infomation and click on “Save”.
| VPN provider | Windows(built-in) |
| Connection name | Any(e.g.: VPN) |
| Server name or address | Choose from Server info. (e.g.: ukvpn001.cyberhermit.net) |
| VPN type | L2TP/IPsec with pre-shared key |
| Pre-shared key | Insert “Secret key” on your VPN activation mail(e.g.: abcdef). |
| Type of sign-in info | User name and password |
| User name (optional) | Insert “Username” on your VPN activation mail(e.g.: testuser). |
| Passord (optional) | Insert “VPN password” on your VPN activation mail(e.g.: 112233ss). |
| Remember my sign-in info | Check |
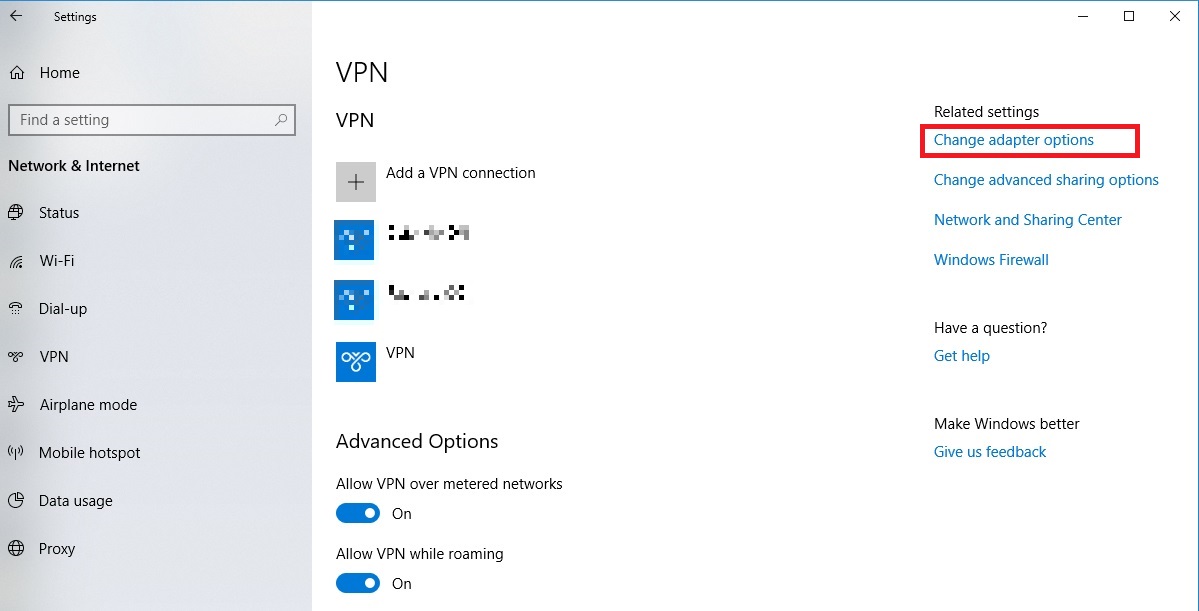
5. Click on “Change adapter options”.
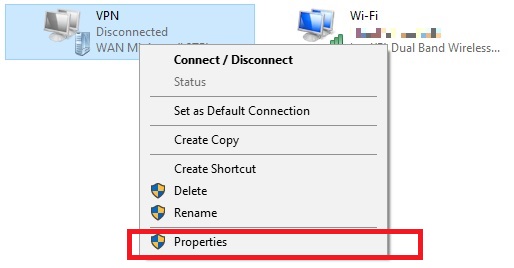
6. Right click on newly created VPN connection “VPN” and select Properties.
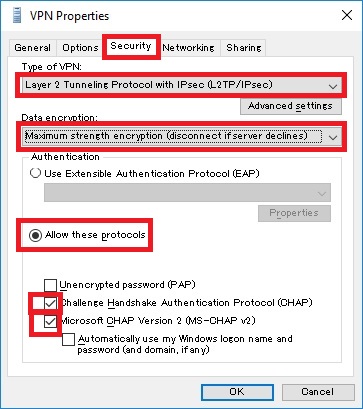
7. Select “Security Tab” and insert information according to the figure below. And click on Advanced settings.
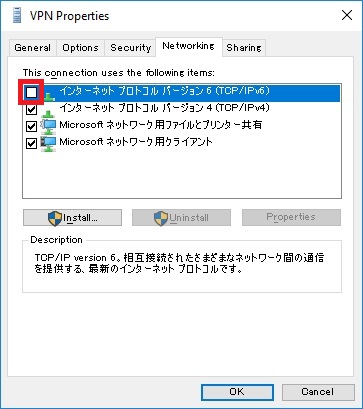
8. Select “Netowork Tab” and uncheck “Internet Protocol Version 6 (TCP/IPv6)”.And click on “OK”.
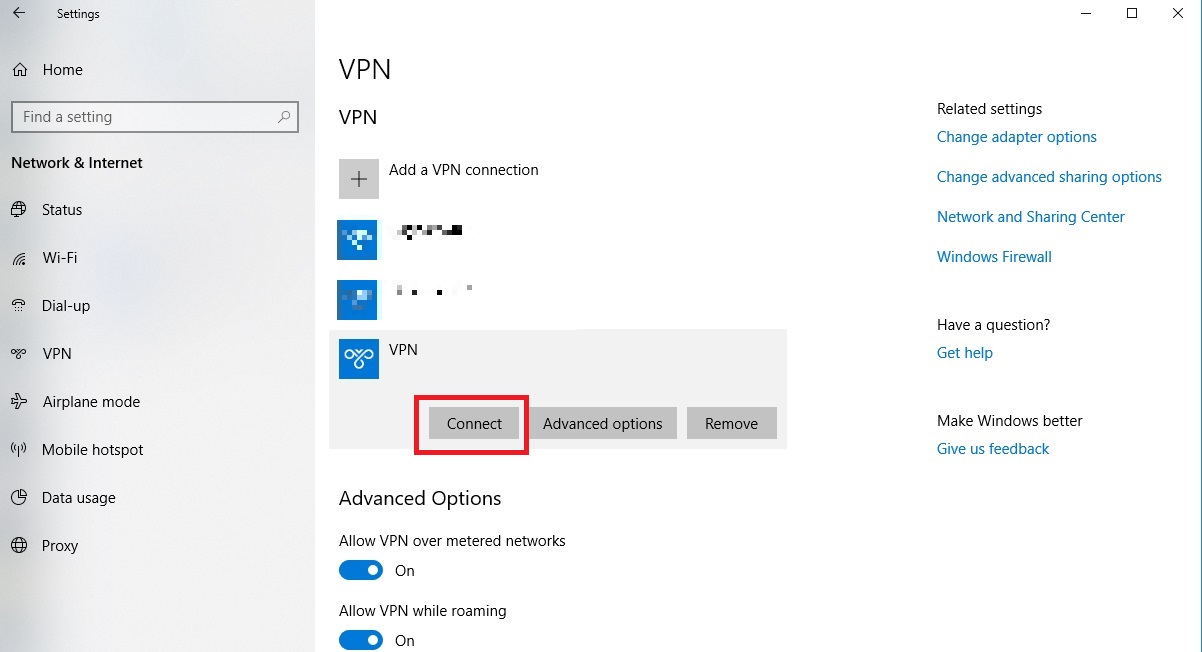
9. Choose “VPN” and click “Connect”!
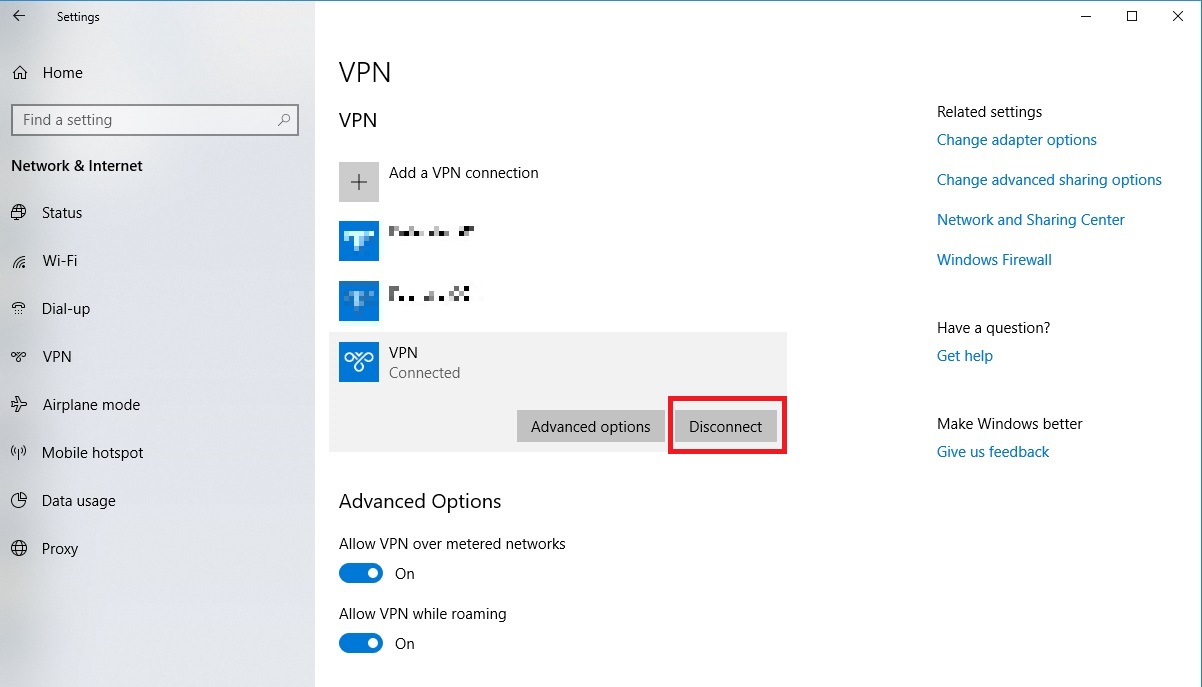
10. When you disconnect VPN, click “Disconnect” on “VPN”.